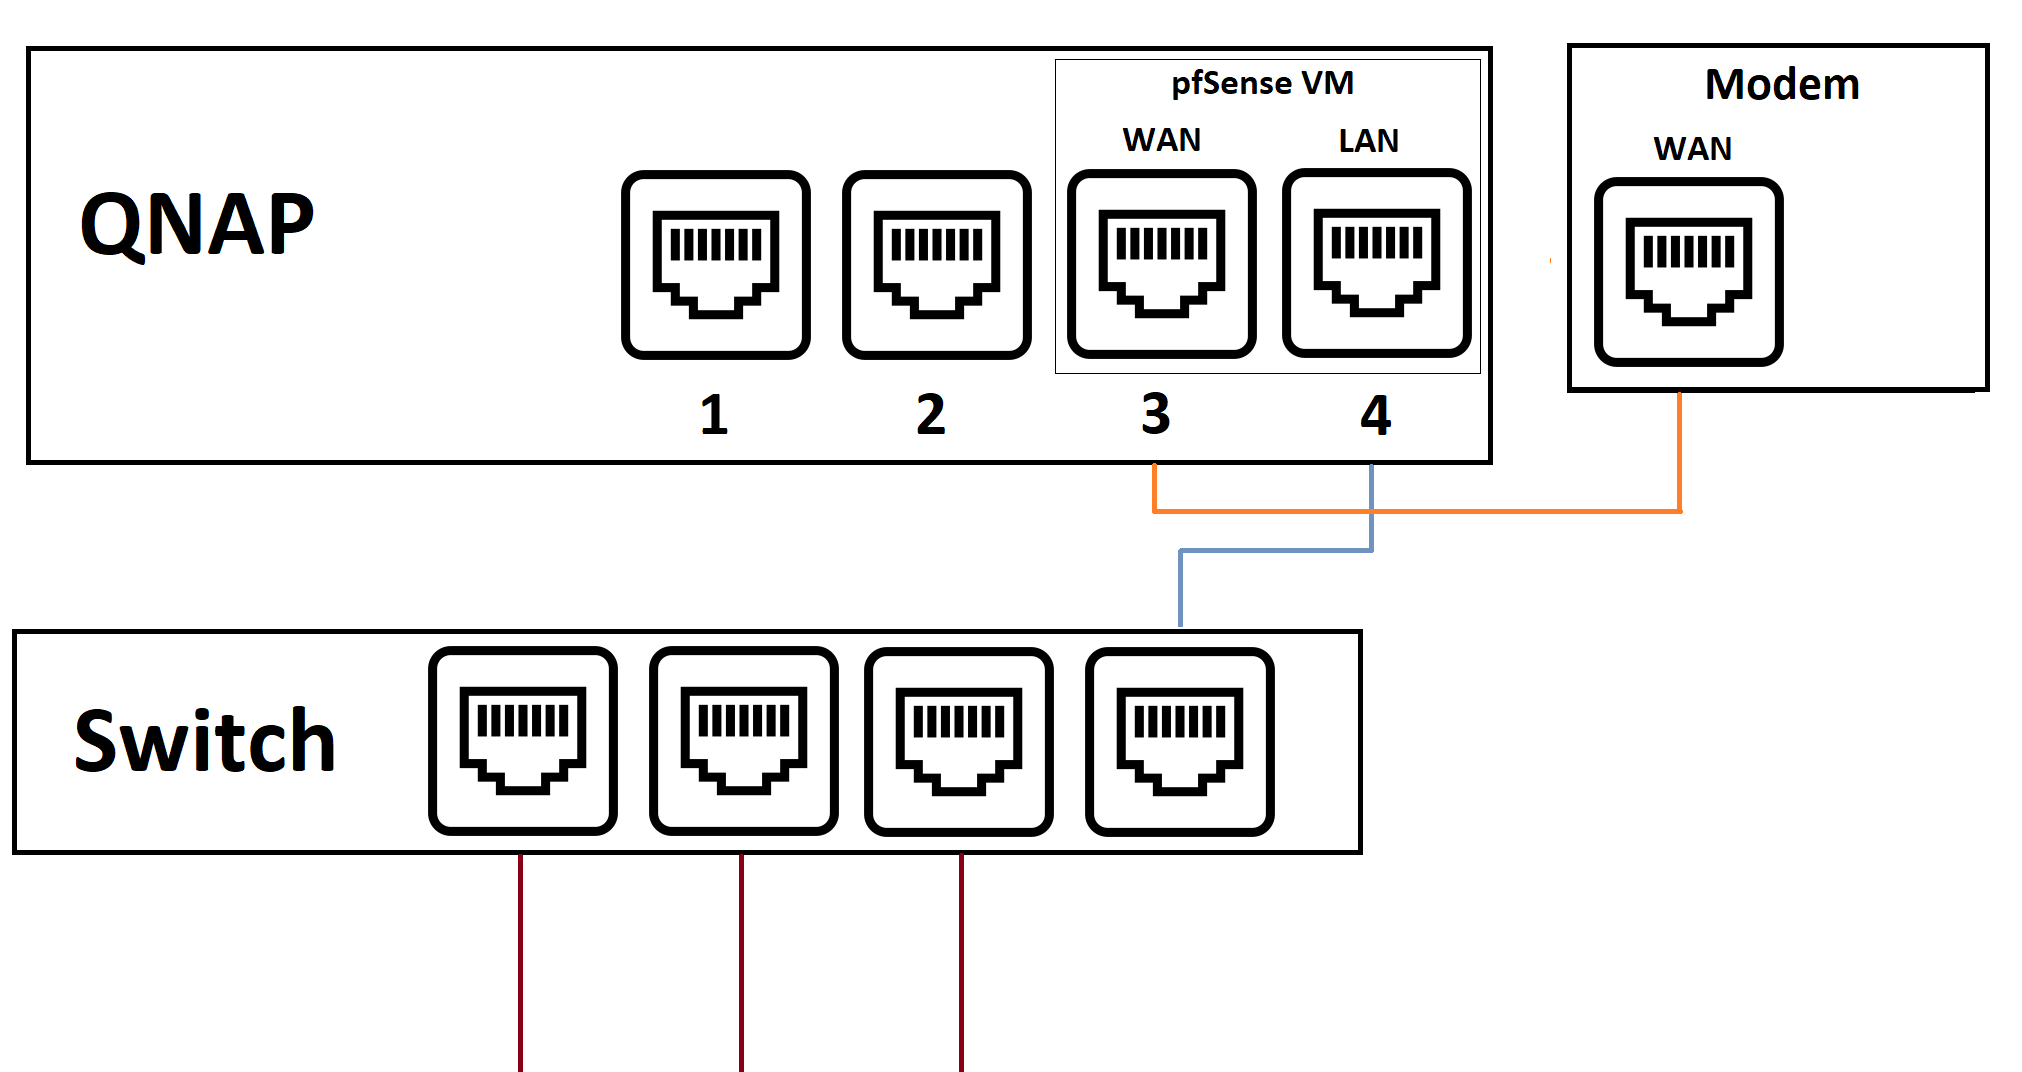
To begin you must have atleast 2 adapters, one will be the WAN and the other is the LAN. Though I recommend that you have 3 adapters as you should ensure that one of the adapter is for direct access to the NAS, otherwise you will lose connection when ever your pfSense is turned off. For this example, adapter 3 is WAN and adapter 4 is LAN.

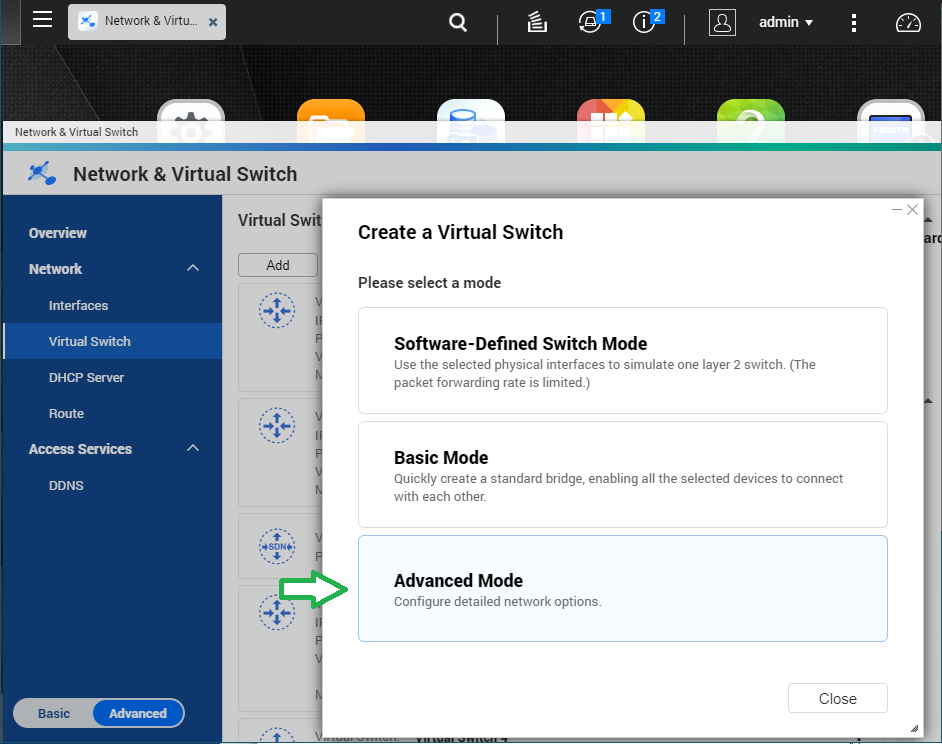
Create a Virtual Switch for each of the WAN and LAN adapters, click ‘Add’ and select ‘Software-Defined Switch Mode’
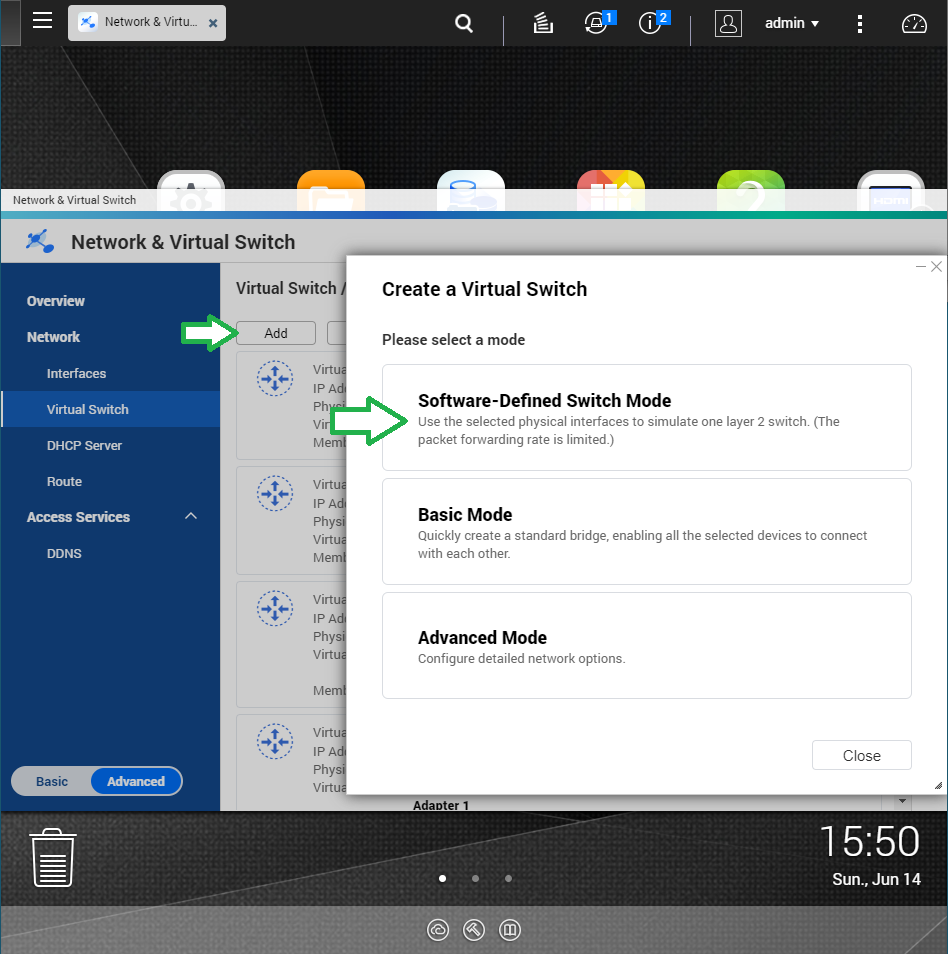
Choose your adapter for WAN, and then click apply. You will then have a Virtual Switch named ‘Software Defined Switch 1’ created in the list. Now create another for the LAN Virtual Switch
The Virtual Switch for LAN must be made in ‘Advanced Mode’, this is because you can access the NAS via pfSense it must be able to assign a IP. Whereas ‘Software-Defined Switch Mode’ will not be able to assign an IP.
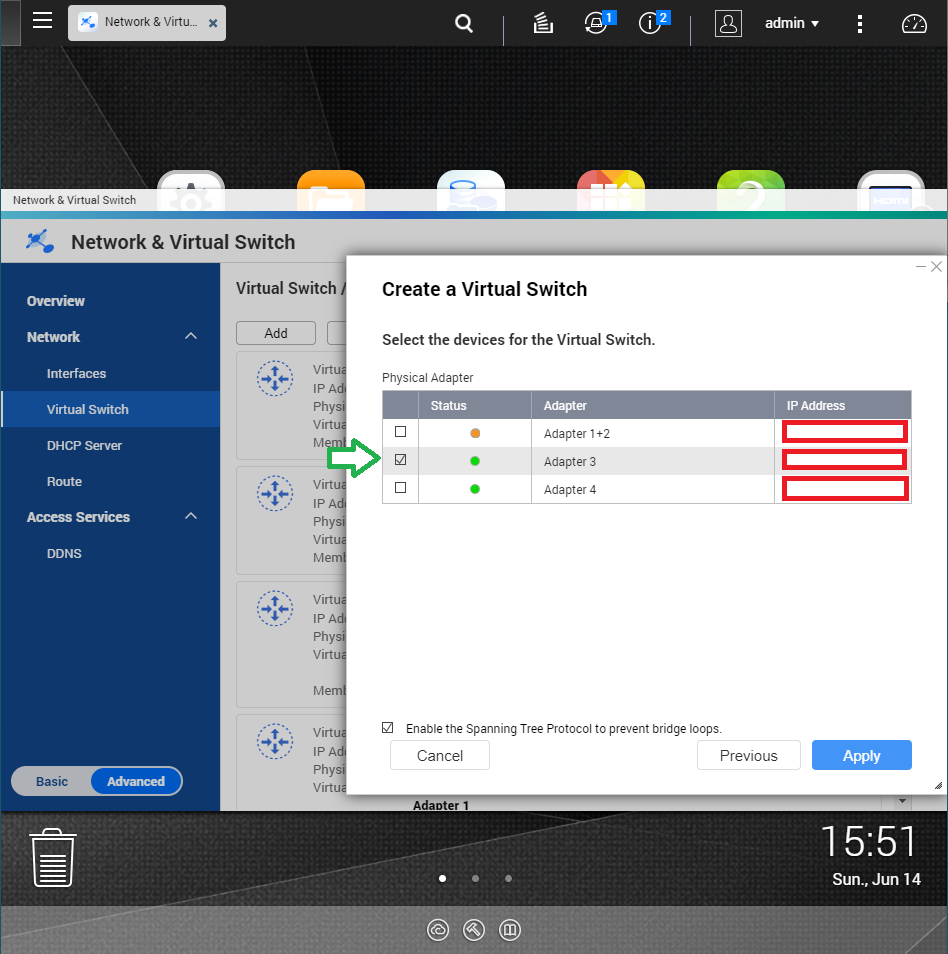
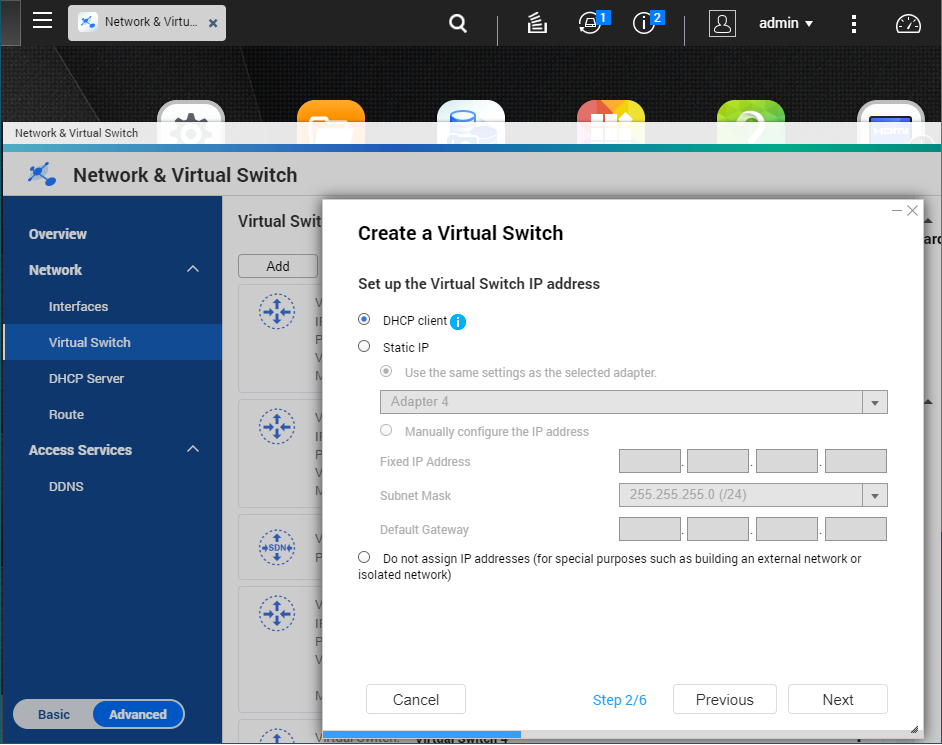
If you have multiple adapters that you wish to use as LAN, you can assign the physical adapters here. For this example I’m just using Adapter 4 as LAN.

To be able to access the NAS from pfSense you can specify an Static IP or just automatically as a DHCP Client. Leave it as DHCP Client if you wish to manage this from pfSense.
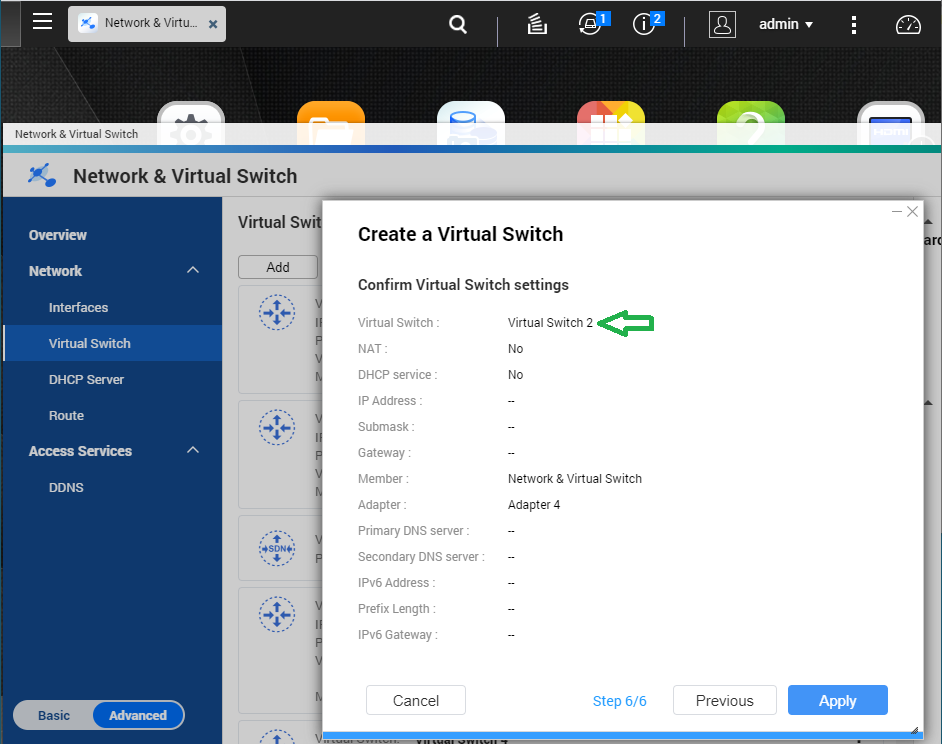
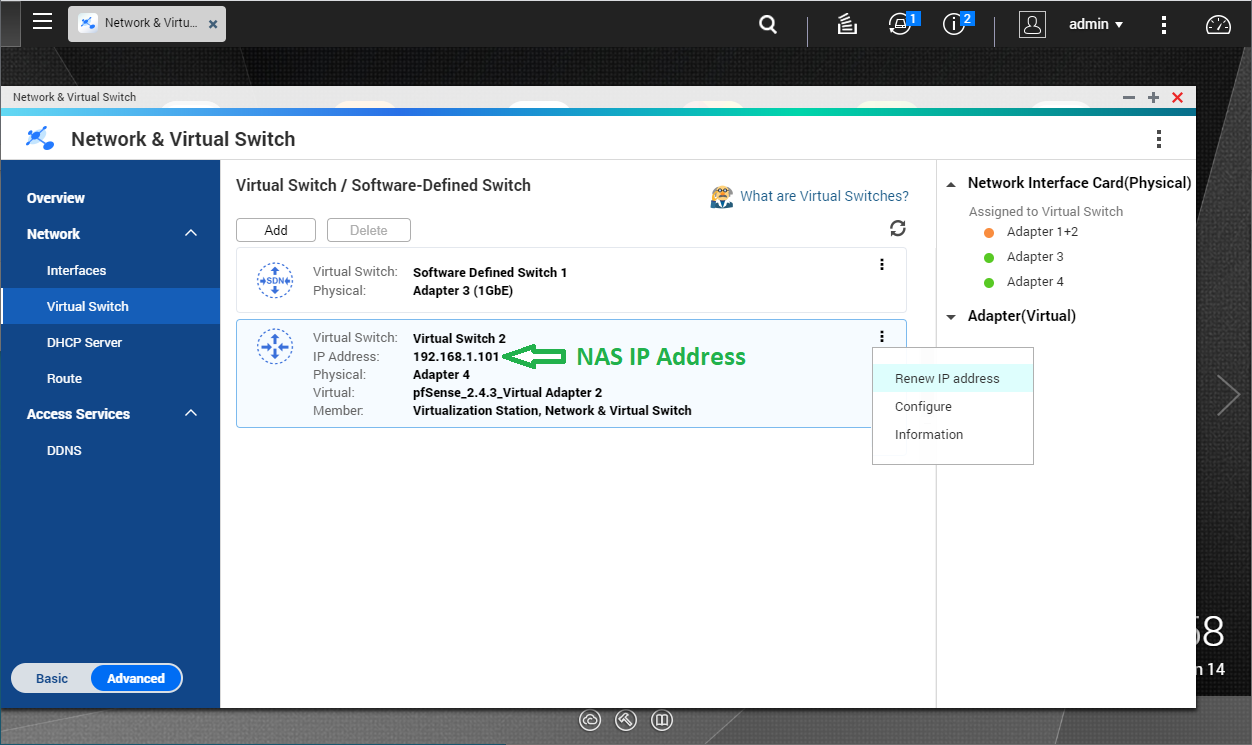
In the summary you can see that the new Virtual Switch is named ‘Virtual Switch 2’.
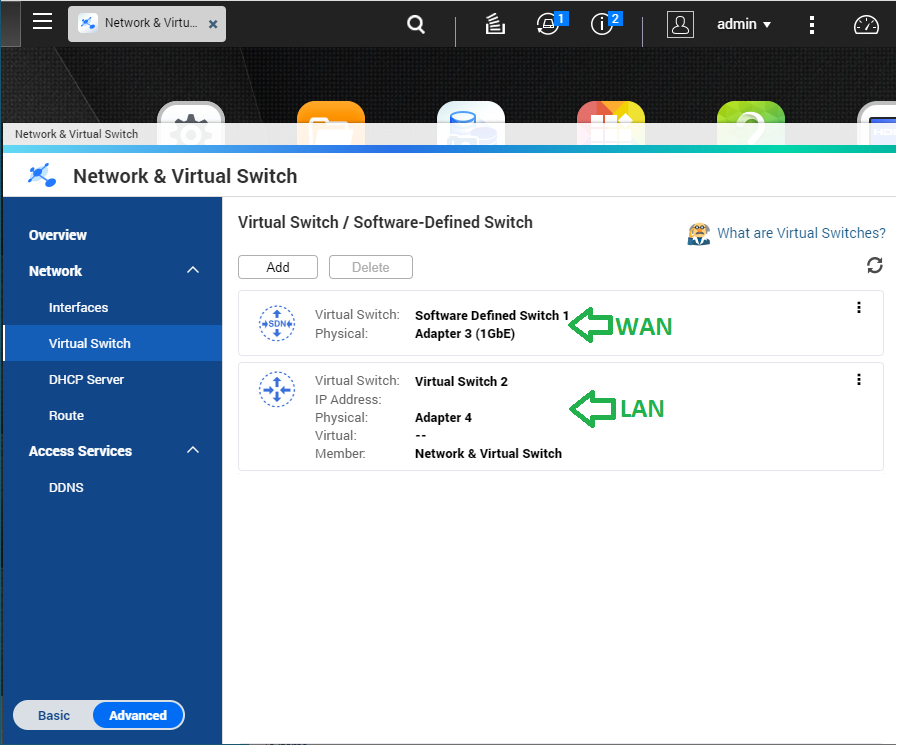
You should have two Virtual Switches ready to load with the pfSense VM.
Download QNAP pre-ready made VM of pfSense:
https://www.qnap.com/solution/pfsense/en/
Extract the zip file that you downloaded, for example the pfSense_2.4.3.zip should contain pfSense_2.4.3.qvm
Within VirtualizationStation 3 you can import the file directly from your computer, select import from PC and find the extracted qvm file.

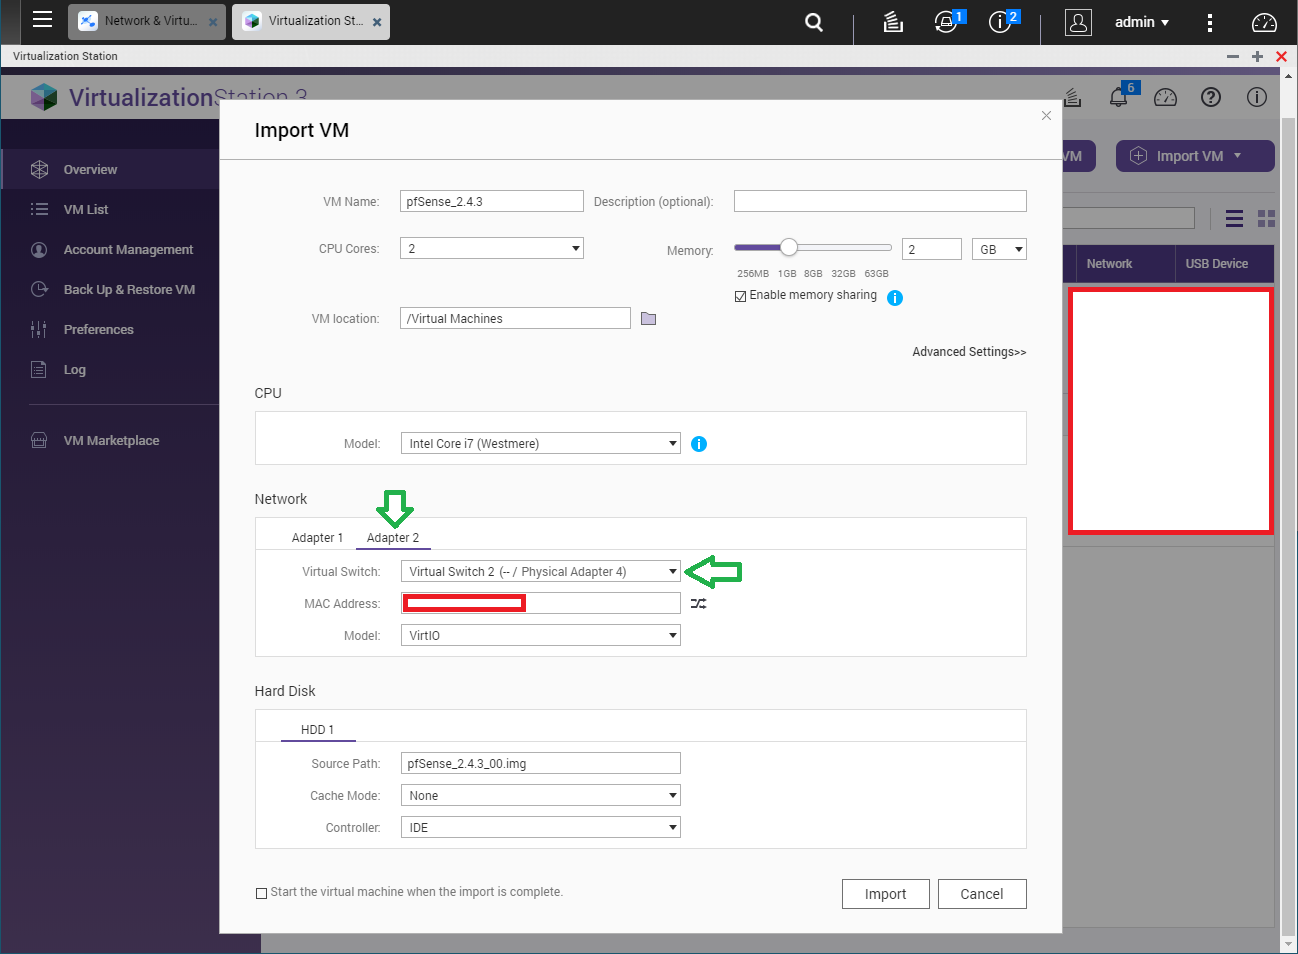
You must amend the Adapters to the Virtual Switches that we created earlier. Ensure that Adapter 1 is the WAN Virtual Switch, select the “Software Defined Switch 1”.

For Adapter 2 you must select the LAN Virtual Switch, for this example “Virtual Switch 2”.
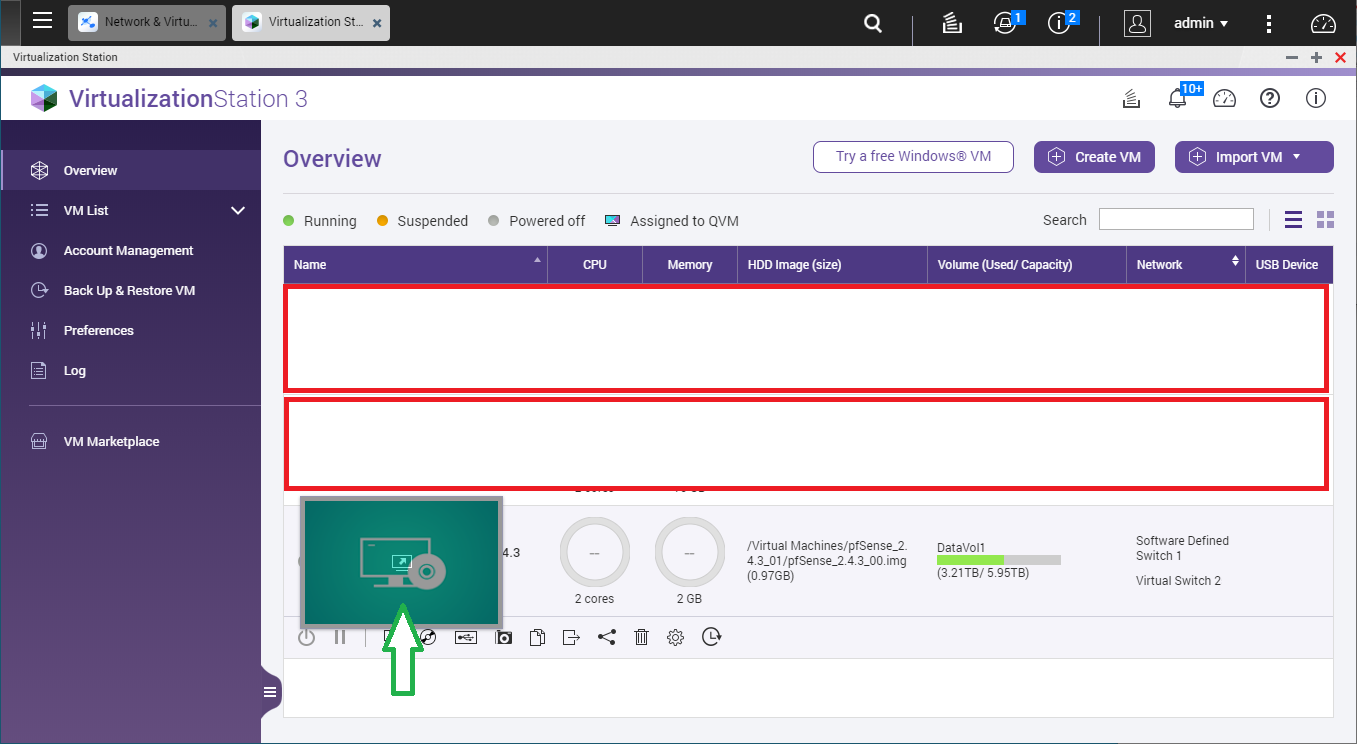
Importing the VM will take a few minutes.

Power up the VM, and then clicking on the desktop icon to remote desktop the machine.
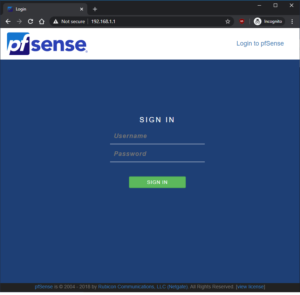
You should see the pfSense terminal, the WAN and LAN port should be ready. Connect to any of your LAN adapters, and access the web GUI via 192.168.1.1.

Optional – How to amend the web access for pfSense to something other than 192.168.1.1.
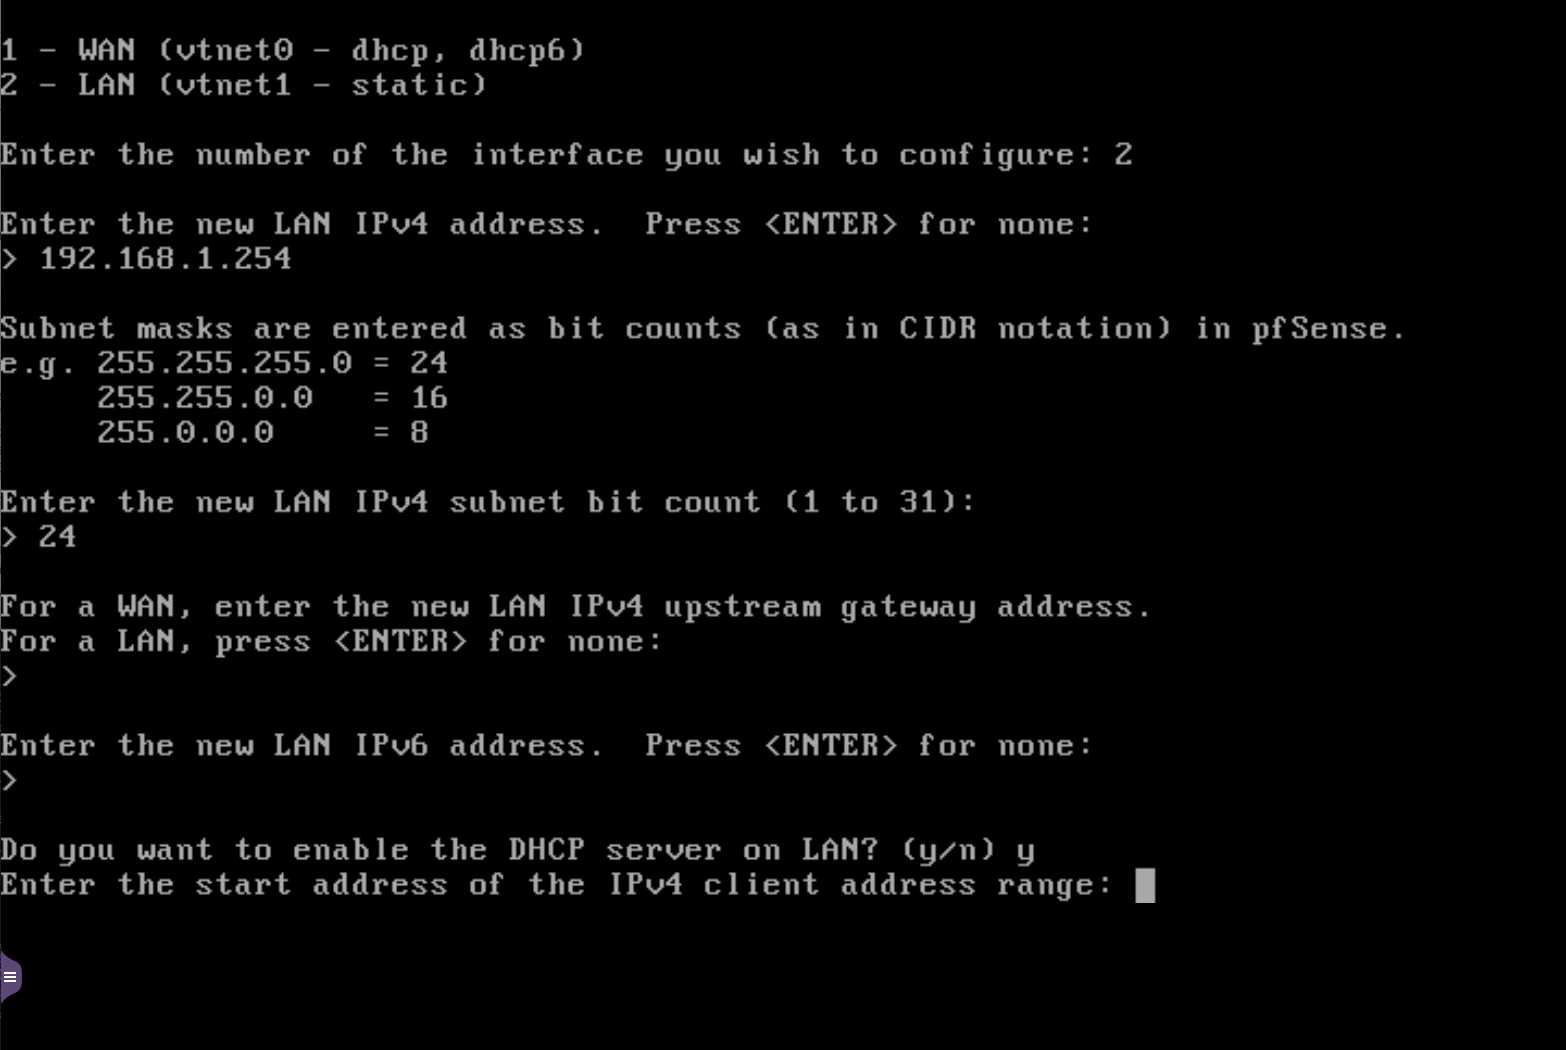
Within the Terminal you want to ‘Set interface(s) IP address’, just type ‘2’ option. Then you want to amend the LAN interface, just type ‘2’ option. It will then ask you to set the new web access for pfSense, normally people assign it to the end of their DHCP. Here is an example:
IPv4 Addess: 192.168.1.254
IPv4 Subnet Bit: 24
Enable DHCP Server for LAN: y
IPv4 Client Start Address: 192.168.1.1
IPv4 Client End Address: 192.168.1.253
You should be able to access the new address upon refreshing your connection, now you can access the pfSense GUI.
The login uses these default values.
Username:
admin
Password:
pfsense

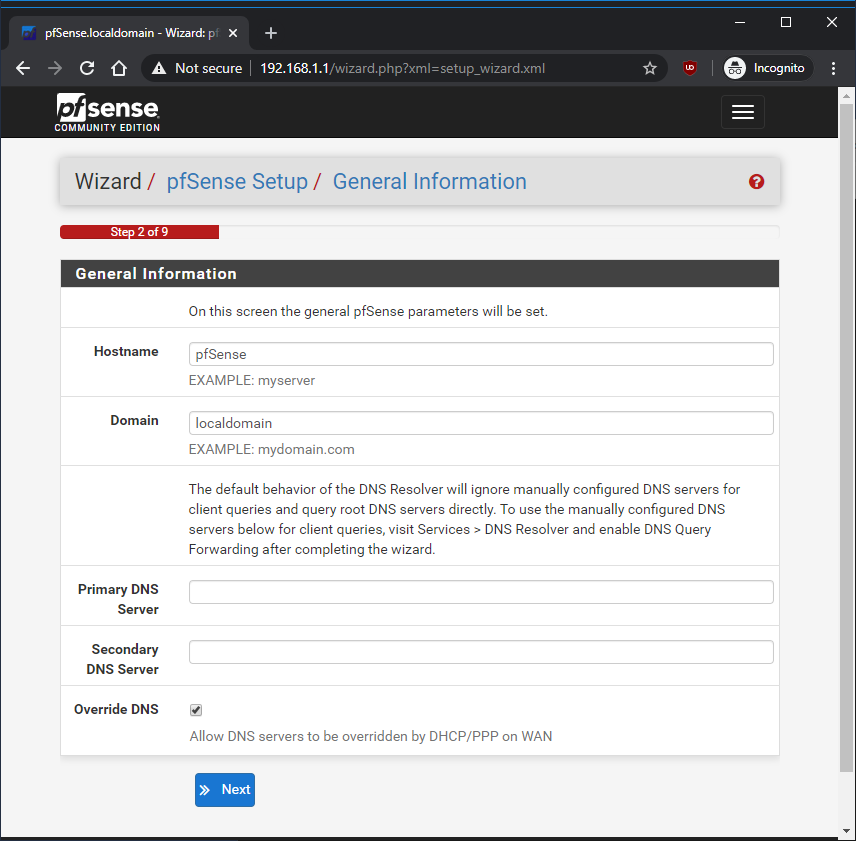
The wizard installation will begin, and you can set up the router to your liking using the web interface
After finishing the setup, you must “Disable hardware checksum offload” through System > Advanced > Networking under the Network Interfaces section. Otherwise you will have really slow upload like 0.1mbps, though your download will look fine.

Here is a speedtest between the two modes, as you can tell the download speed increment ever so slowly to your download limit but the upload will just crawl to the finish line.

You can find your NAS IP address within the Virtual Switch section, where the LAN ‘Virtual Switch 2’ will show the IP that is assigned to pfSense. You can renew the address using the GUI if you put a static IP on pfSense DHCP Server

I love your guide and I am new to the NAS world. Forgive me, but I tried a few times but could not get it running. I am confused about having two adapter for WAN and LAN. My current set up is my NAS is connected to my router and my router is connect to a fiber network via WAN. Am i setting up my NAS incorrectly? Much help would be appreciated.
Hi Anthony,
Using pfSense is a router/firewall solution, so your pfSense WAN should connect to the source of your internet. Ideally you set your router to bridge mode, which will provide the internet (WAN) to your pfSense QNAP.
The LAN on the pfSense QNAP is used to connect nodes just like a router would, please note there is going to be some downfall with using an VM of pfSense on QNAP.
Issues:
My QNAP QGD-1600P-4G has been running pfSense for awhile without issues, though my modem did fail to provide internet but turning it off and on made it work again. Most people would prefer to get a standalone system for pfSense, but as long you manage the VM it’s all fine.