
Basic set-up of using QNAP container interface to install Mumble in Docked, download Container Station from the AppStore and find coppit/mumble-server.

Get the latest tag build

You can edit the name, apply CPU and memory restrictions, I’ve decided to put 2GB of RAM.

Ensure that port 64738 with TCP and UDP is enabled via the port forwarding section
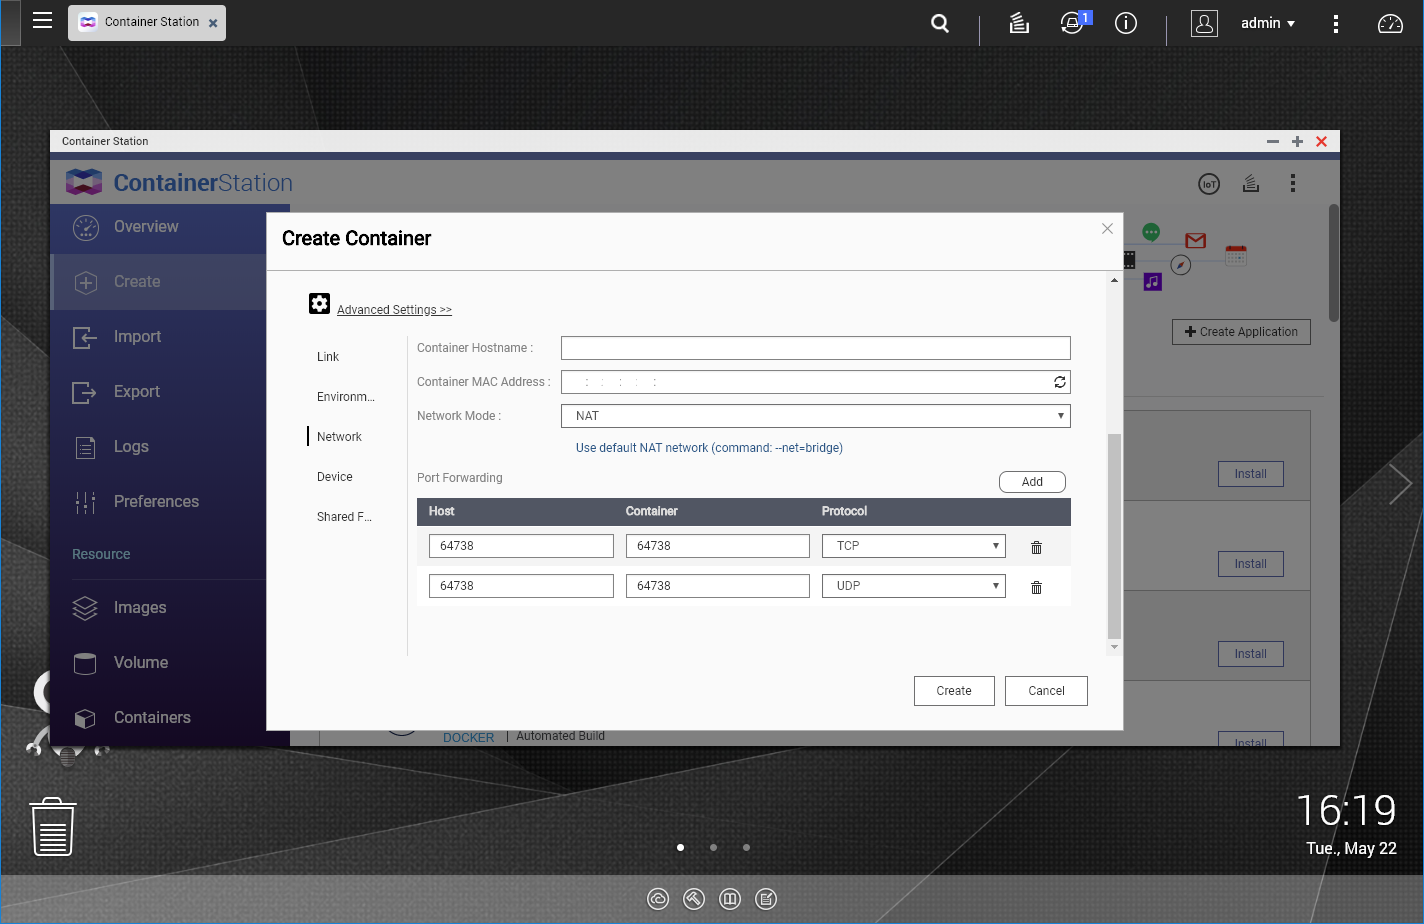
Make a volume name for the data folder, where mumble settings are defaulted

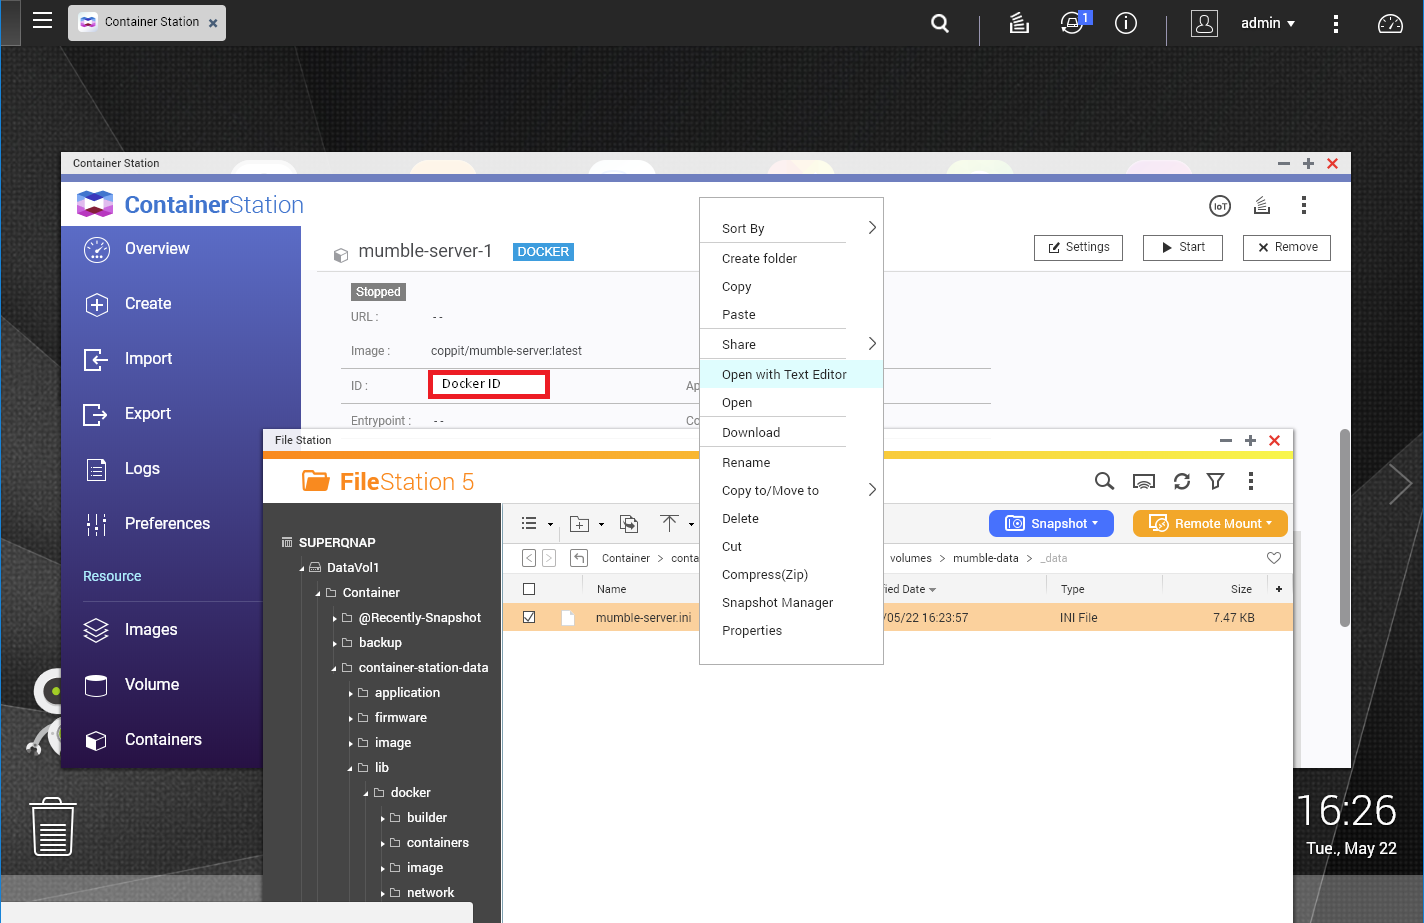
Upon making the docker, in the terminal you will notice that it has created the config file for you.

To find it, it be in
/Container/container-station-data/lib/docker/volumes/mumble-data/_data/
# Murmur configuration file.
#
# General notes:
# * Settings in this file are default settings and many of them can be overridden
#   with virtual server specific configuration via the Ice or DBus interface.
# * Due to the way this configuration file is read some rules have to be
#   followed when specifying variable values (as in variable = value):
#     * Make sure to quote the value when using commas in strings or passwords.
#        NOT variable = super,secret BUT variable = "super,secret"
#     * Make sure to escape special characters like '\' or '"' correctly
#        NOT variable = """ BUT variable = "\""
#        NOT regex = \w* BUT regex = \\w*

# Path to database. If blank, will search for
# murmur.sqlite in default locations or create it if not found.
database=/data/mumble-server.sqlite

# If you wish to use something other than SQLite, you'll need to set the name
# of the database above, and also uncomment the below.
# Sticking with SQLite is strongly recommended, as it's the most well tested
# and by far the fastest solution.
#
#dbDriver=QMYSQL
#dbUsername=
#dbPassword=
#dbHost=
#dbPort=
#dbPrefix=murmur_
#dbOpts=

# Murmur defaults to not using D-Bus. If you wish to use dbus, which is one of the
# RPC methods available in Murmur, please specify so here.
#
dbus=system

# Alternate D-Bus service name. Only use if you are running distinct
# murmurd processes connected to the same D-Bus daemon.
#dbusservice=net.sourceforge.mumble.murmur

# If you want to use ZeroC Ice to communicate with Murmur, you need
# to specify the endpoint to use. Since there is no authentication
# with ICE, you should only use it if you trust all the users who have
# shell access to your machine.
# Please see the ICE documentation on how to specify endpoints.
ice="tcp -h 127.0.0.1 -p 6502"

# Ice primarily uses local sockets. This means anyone who has a
# user account on your machine can connect to the Ice services.
# You can set a plaintext "secret" on the Ice connection, and
# any script attempting to access must then have this secret
# (as context with name "secret").
# Access is split in read (look only) and write (modify)
# operations. Write access always includes read access,
# unless read is explicitly denied (see note below).
#
# Note that if this is uncommented and with empty content,
# access will be denied.

#icesecretread=
icesecretwrite=

# How many login attempts do we tolerate from one IP
# inside a given timeframe before we ban the connection?
# Note that this is global (shared between all virtual servers), and that
# it counts both successfull and unsuccessfull connection attempts.
# Set either Attempts or Timeframe to 0 to disable.
#autobanAttempts = 10
#autobanTimeframe = 120
#autobanTime = 300

# Specifies the file Murmur should log to. By default, Murmur
# logs to the file 'murmur.log'. If you leave this field blank
# on Unix-like systems, Murmur will force itself into foreground
# mode which logs to the console.
logfile=/data/mumble-server.log

# If set, Murmur will write its process ID to this file
# when running in daemon mode (when the -fg flag is not
# specified on the command line). Only available on
# Unix-like systems.
pidfile=/var/run/mumble-server/mumble-server.pid

# The below will be used as defaults for new configured servers.
# If you're just running one server (the default), it's easier to
# configure it here than through D-Bus or Ice.
#
# Welcome message sent to clients when they connect.
welcometext="<br />Welcome to this server running <b>Murmur</b>.<br />Enjoy your stay!<br />"

# Port to bind TCP and UDP sockets to.
port=64738

# Specific IP or hostname to bind to.
# If this is left blank (default), Murmur will bind to all available addresses.
#host=

# Password to join server.
serverpassword=

# Maximum bandwidth (in bits per second) clients are allowed
# to send speech at.
bandwidth=72000

# Maximum number of concurrent clients allowed.
users=100

# Amount of users with Opus support needed to force Opus usage, in percent.
# 0 = Always enable Opus, 100 = enable Opus if it's supported by all clients.
#opusthreshold=100

# Maximum depth of channel nesting. Note that some databases like MySQL using
# InnoDB will fail when operating on deeply nested channels.
#channelnestinglimit=10

# Regular expression used to validate channel names.
# (Note that you have to escape backslashes with \ )
#channelname=[ \\-=\\w\\#\\[\\]\\{\\}\\(\\)\\@\\|]+

# Regular expression used to validate user names.
# (Note that you have to escape backslashes with \ )
#username=[-=\\w\\[\\]\\{\\}\\(\\)\\@\\|\\.]+

# Maximum length of text messages in characters. 0 for no limit.
#textmessagelength=5000

# Maximum length of text messages in characters, with image data. 0 for no limit.
#imagemessagelength=131072

# Allow clients to use HTML in messages, user comments and channel descriptions?
#allowhtml=true

# Murmur retains the per-server log entries in an internal database which
# allows it to be accessed over D-Bus/ICE.
# How many days should such entries be kept?
# Set to 0 to keep forever, or -1 to disable logging to the DB.
#logdays=31

# To enable public server registration, the serverpassword must be blank, and
# this must all be filled out.
# The password here is used to create a registry for the server name; subsequent
# updates will need the same password. Don't lose your password.
# The URL is your own website, and only set the registerHostname for static IP
# addresses.
# Only uncomment the 'registerName' parameter if you wish to give your "Root" channel a custom name.
#
#registerName=Mumble Server
#registerPassword=secret
#registerUrl=https://www.mumble.info/
#registerHostname=

# If this option is enabled, the server will announce its presence via the
# bonjour service discovery protocol. To change the name announced by bonjour
# adjust the registerName variable.
# See http://developer.apple.com/networking/bonjour/index.html for more information
# about bonjour.
#bonjour=True

# If you have a proper SSL certificate, you can provide the filenames here.
# Otherwise, Murmur will create it's own certificate automatically.
#sslCert=
#sslKey=

# The sslCiphers option chooses the cipher suites to make available for use
# in SSL/TLS. This option is server-wide, and cannot be set on a
# per-virtual-server basis.
#
# This option is specified using OpenSSL cipher list notation (see
# https://www.openssl.org/docs/apps/ciphers.html#CIPHER-LIST-FORMAT).
#
# It is recommended that you try your cipher string using 'openssl ciphers <string>'
# before setting it here, to get a feel for which cipher suites you will get.
#
# After setting this option, it is recommend that you inspect your Murmur log
# to ensure that Murmur is using the cipher suites that you expected it to.
#
# Note: Changing this option may impact the backwards compatibility of your
# Murmur server, and can remove the ability for older Mumble clients to be able
# to connect to it.
#sslCiphers=EECDH+AESGCM:AES256-SHA:AES128-SHA

# If Murmur is started as root, which user should it switch to?
# This option is ignored if Murmur isn't started with root privileges.
uname=mumble-server

# If this options is enabled, only clients which have a certificate are allowed
# to connect.
#certrequired=False

# If enabled, clients are sent information about the servers version and operating
# system.
#sendversion=True

# You can configure any of the configuration options for Ice here. We recommend
# leave the defaults as they are.
# Please note that this section has to be last in the configuration file.
#
[Ice]
Ice.Warn.UnknownProperties=1
Ice.MessageSizeMax=65536
Recommend that you apply a password to your server on line 98
serverpassword=
Also add in your SSL certificate location on line 160 and 161, remember that you need to use a fullchain and a priv.key. Just add the required files in the /data folder where the mumble-server.ini is located.
sslCert=/data/fullchain.pem
sslKey=/data/privkey.pem
Once you edited the mumble default settings, you will notice that you will have this error ‘ServerDB: Failed initialization: unable to open database file Error opening database’ in the terminal. The issue is that the /data folder does not have the same permission as the default user:group mumble-server:mumble-server. This prevents the mumble-server.log to be written in the /data folder, to apply the permission you need a terminal use Telnet or SSH.
Only the account admin can login remotely.
This is a Telnet example
o [I.P address] [port]

docker exec -it [Docker ID] bash

chown -R mumble-server:mumble-server /data
All done ready to go, make sure you port-forward it correctly


This setup guide assumes one knows how to get SSL certificates and put them in the data folder. Also I got to the end and indeed my container started and posed the “unable to open database file Error opening database” just as the guide had predicted. but then the guide says “…use Telnet or SSH”. The following guide has a Telnet example, but I couldn’t figure it out. I assume some folks must intuitively know where to type “o [I.P address] [port]” But it wasn’t intuitive to me. It doesn’t look like the coppit/mumble server container acquired its own IP address when starting. I can SSH into the parent QNAP server, but it doesn’t have a path called /data/ like the container has, so wasn’t sure where to navigate to launch the chown command. Also in QNAP container station one can send a command direct to the container by using the >_ Terminal button on the Container Station UI. Non of the three commands listed in the guide seemed to work.
Any help in improved chown permissions guide would be greatly appreciated. I assume if I had a unique IP to the mumble server and could SSH into it, then I would see the /data/ path and could have confidence that the chown command would work.
Hi Scott, you can’t SSH or Telnet to a specific docker, that isn’t what it should be used for.
1) Enable SSH or Telnet your QNAP first, to do this I would recommend SSH connection. Go to Control Panel > Telnet / SSH and enable Allow SSH connection. Please note that only Administrators account can do this, such as ‘admin’ user.
2) Open up ‘PowerShell’ type ‘ssh [USERNAME]@[IPADDRESS]’ of your QNAP.
3) type ‘docker exec -it [Docker ID OR Docker Name]’ to access the terminal of the docker directly
4) run the command
I don’t run mumble anymore, it was too much hassle that I’ve settled to using Discord now. This guide is really old, so you would have to figure things out on your end.
Thank you for this guide! I find Discord to be a massive overkill of features and UI, and lacks the purely private existence of a mumble server.
A couple updates for the guide:
1. If still having problems opening the database file after using chown, try running:
sudo chmod 640 mumble-server.sqlite
2. You’ll probably have to update murmur in order to connect with the latest Mumble clients:
sudo apt-get update
sudo apt-get install mumble-server
Yeah Mumble allows you to host privately, just that everyone have to install the client. Once it running, it just works.
The community audience in Discord is better for my side projects, but yeah this post needs updating. Thanks for commenting, people will bound to see your suggestions.