The casing for the DS218+ make upgrading the first SO-DIMM difficult, it involves taking the whole device apart and flipping the motherboard while the DS718+ and DS918+ has the first slot exposed without having to disassemble the device.
The Intel Celeron J3455 CPU (4 core) in the DS718+ and DS918+ needed a different motherboard layout due to the taller heatsink for the higher temperature, this force Synology to put the motherboard facing up allowing more air flow without a metal cage design.
Lets get to disassembling the DS218+, first empty the storage bays
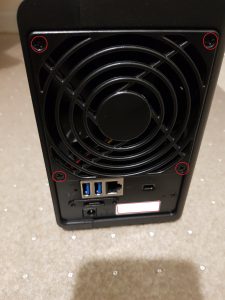
Remove the 4 screws from the back of the unit.
Have a plastic tool to pull down the metal bracket inside the entrance of the storage bays, I wouldn’t recommend a metal tool due to the soft plastic casing.
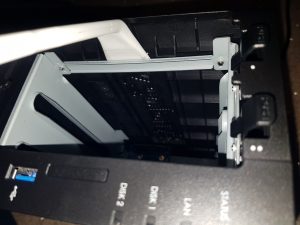
While pulling down the metal bracket slide the top cover inwards
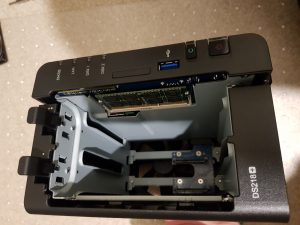
Lift the top cover to expose the casing.
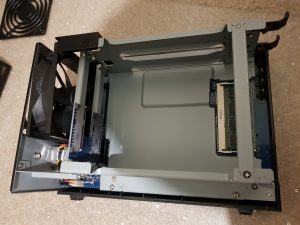
Remove the single screw at the back to allow the plate to be removed.
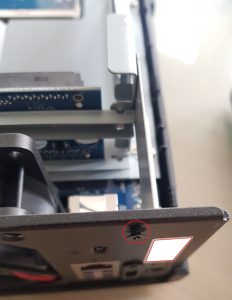
Hold on to the metal plate when removing the top screw, and remove the two screw that connect to the bottom of the casing.
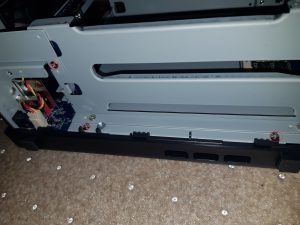
Remove the single screw for the plastic fan holder.
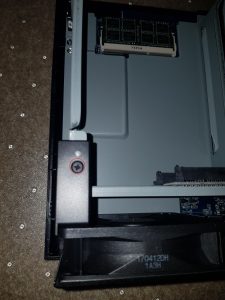
Remove the two screw that connect to the bottom of the case on the other side.
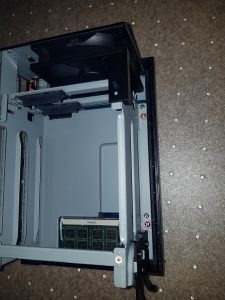
You have to tilt the metal case to allow the motherboard to be removed from the bottom casing.
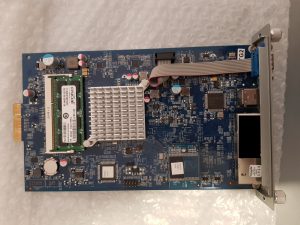
Top view of the DS218+ motherboard but mounted upside down, the CPU is located here due to the heatsink being shorter and wider than the DS718+ and DS918+ heatsink. To flip the motherboard you have to remove the motherboard from the metal casing with the 4 screws
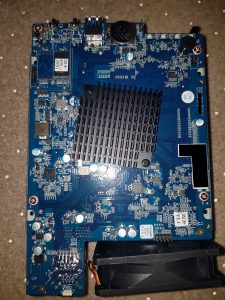
Pull the motherboard up from this side to disconnect the SATA connector, making it easier to lift the board from the case.
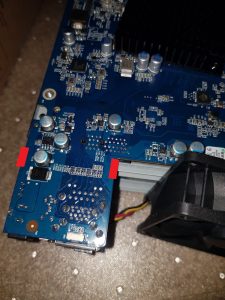
Replace the first SO-DIMM with a matching module as your second, to assemble it just reverse the steps.
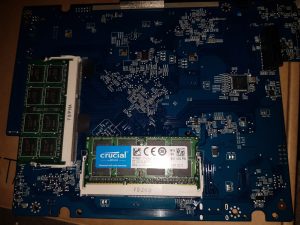
Upon switching it on, you can check the RAM upgrade instantly in the Info section. I would recommend doing a memory test with Synology Assistant application.
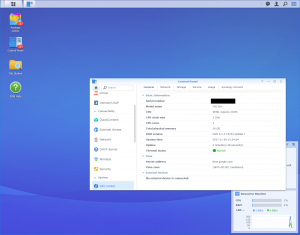
Now to benchmark the difference between mis-match and matching pair memory modules.
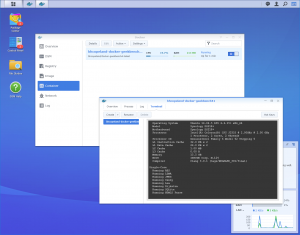
Better performance shown in Geekbench
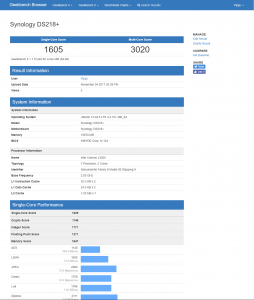
DS218+ 10GB vs 16GB Compare link
DS218+ 2GB vs 16GB Compare link
Shows a big boast in Memory performance when installing matching modules compared to the 2GB and 8GB combination set-up I had earlier.
This 16GB combination makes it closer to the Intel Atom C2538 CPU with the same Crucial 16GB set-up, the memory performance helps push the numbers up.
DS218+ 16GB vs RS215+ 16GB Compare link
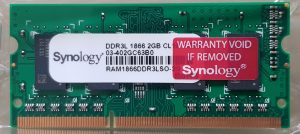
The default module in the DS218+ is:
2GB DDR3L 1866Mhz CL13 1.35V,
Final set-up:
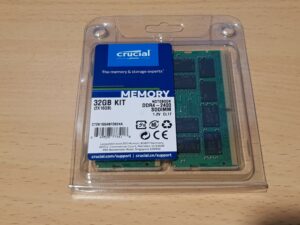
2*Crucial 8GB DDR3L 1600MHz CL11 1.35V CT102464BF160B
There isn’t a need to get the fastest 1866Mhz module when the performance is just as good as the Intel Atom C2538.
While Synology does not recommend in replacing their default memory, it’s best that you keep the memory module in a safe place to revert the changes. Hope you find this tutorial helpful

I just got 218+ and I am going to upgrade the RAM, but I I don’t get something: even if you feed it with 16 GB, the CPU is limited to total 8GB of RAM (see here: https://ark.intel.com/products/95597/Intel-Celeron-Processor-J3355-2M-Cache-up-to-2_5-GHz).
So, even if you upgrade it to 10 or 16 GB, and even if it shows the total amount, can the DS actually use it? Did you try running some VM using more than allocatable amount of ram? Say, Win10 allocating 13 GB of RAM in virtual machine?
Thanks
Everything seems to work fine, docker and VM detects the 16GB. There are many people that has already done this upgrade with no ill effect. The Intel documentation is probably stating one channel, where the CPU can handle two memory channel
Interesting- but, money would have been much better spent going with the 718+ and simply going with (2) 4GB modules.
Here in UK, the cost of the DS218+ £311 to the DS718+ £415 is £114 difference, price from Amazon.UK at the time. The 16GB RAM only costed £64, it’s still £50 more to get an 2GB DS718+ I would still need to spend more money on getting the DS718+?
Thanks. I will try the setup myself.
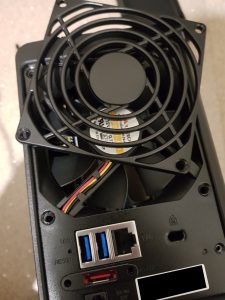
On unrelated note, I was very cautious regarding noise. Noise issues with DS218+ can be fixed with noctua NF A9 FLX. I installed it and the LowNoise adapter (13). The device is virtually silent now.
NOCTUA: https://noctua.at/en/products/fan/nf-a9-flx
ORIGINAL is FD129225LL-N: http://www.ystech.com.tw/ysfan/products_detail.asp?id=57
26th on the list. Just comparing numbers is crazy, actual performance even more.
Odd that your default fan seems loud, on my system the HDD that I’ve used seems louder than the fan. Overall the system is not distracting when located above my head on a shelf, though I will check out your recommendation if the fans dies.
Thanks. I was looking into replace the fan.
Do you get fan error beeps when replacing the stock with the NF-A9?
Can we hope an disassemble guide for DS418 ?
Must have ‘+’ or ‘play’ model name for consumer DiskStation to have removable RAMs removable, sadly your DS418 would not be able to upgrade. Hence an disassemble guide would not help.
Only the ‘+’ model allows memory upgrade. Play models have memory soldered to the motherboard.
That’s correct, any Realtek all have soldered memory. Haven’t came across that can in the Synology world.
[update]
To expand on the ‘Play’ models, the ones with Intel CPU normally has removable RAMs such as the DS418play, DS416play. Majority of ‘play’ models are Realtek, check the CPU and look for tutorials online.
Hey it’s not for memory upgrade but for replace fan for more quieter one.
I would of assumed you meant memory upgrade consider this post is about upgrading the RAMs, I’m not sure if I get the DS418 in.
Thank you so much for the info! My NAS showed 16GB of memory.
Glad that it all works out 🙂
I am interested in precise specification of the original 2GB module you have removed. Could you please write details or make a good photo where brand and P/N is visible?
The default RAM is a Synology brand label, DDR3L 1866 2GB CL13
03-402GC63B0
RAM1866DDR3LSO-2G
Hi everyone!
I’d like to upgrade the RAM of my DS218+, but I think that 8-10 GB would be enough, so I could achieve this just by adding one 8 GB module.
Do you think it would be good if I add a DDR3L 8GB 1600 Mhz, compared to the original 2GB 1866 Mhz or it would be better removing the original one and only put the 8GB?thanks in advance!
Hello Stefano,
if you need the memory capacity having the 8GB and 2GB setup would benefit you. The decrease of speed for mix match set-up is hardly noticeable for day to day task. Nothing wrong putting in the 8GB and wait for another 8GB in the near future, it be kinda a waste of your time to disassemble the whole unit to remove the 2GB and just install the 8GB. Only reason you may have to remove the default RAM if your 8GB you have bought may not play nice with the default….
Thank you for your kind reply.
So, I think I will go straight with an 8GB 1600 Mhz module in addition to the original 2 GB one. After the upgrade they will both work at 1600 Mhz, right? If this doesn’t cause any isse, I’ll buy a 1600 Mhz, they’re quite cheaper.
Crucial or Corsair are both fine or do you suggest a specific brand?
Thanks
P.S.: wgat if also CL is different? The original should be CL13 while the 8 GB one will probably be CL11.
Thanks
Hi Poyu, should I insert my 8GB RAM as a replacement for the original 2GB then (I probably won’t need 10GB)?
Hi joebiden, you can have just 8GB installed, but the effort to get into the original 2GB is not worth your time. 2GB and 8GB is better as you benefits with the capacity right away, then afterwards when you have the money get the 2GB replace with a matching one at a later date. Though if the original 2GB doesn’t play nicely with your 8GB stick you would be forced to remove the original RAM.
Hi POYU,
Could you please tell me what will the result if you input the command “free -m” from PuTTY console (naturally after connection to the DS218+).
Thanks in advance.
I no longer have the DS218+, though you can probably find the output on Synology Forum. It does handle 16GB RAM capacity, so many has doubts.
Thanks for this guide, it helped me upgrade from 2 to 16GB!
I used 2 sticks of 8GB from Kingston (KVR16LS11/8)
Glad the guide is helpful for you, enjoy the upgrade 🙂
Thanks for the tutorial.
I’ll try to upgrade thermal paste as well during RAM upgrade process this week and be back with results regarding CPU throttling under long, heavy load and fan speeds.
Great post!
I have a DS218+ and put in 16GB (2 * 8GB). Resource Monitor shows 16GB.
I bought Kingston Hyper-X 16GB kit, DDR3L 1866MHz CL11 204pin SODIMM.
I think some of the screws were a bit different, but quite straight forward.
Thanks
Glad that the post helped :), I believe I had the first revision, is probably why there are a few bits changed.