Warning this tutorial uses packages that isn’t maintained, I recommend you use docker, most Synology package are likely out-of-date now. Will leave this page as reference, go to How to setup Mumble server on Synology Docker
Mumble is an free opensource solution for low latency voice communication, that is available for Synology users. There is also TeamSpeak and Ventrilo software, but there are no Synology packages available. So you would have to host yourself or rent the service.
But you probably thinking why can’t you just use Skype, Hangout or any other voice communication?
They are optimised in casual chatting than oppose to realtime communication, has higher latency, uses more bandwidth, and system resources. This would affect your communication in online play, where delays would hinder any team work communication.
Before we start make sure you have SynoCommunity added to your package sources, check out the SynoCommunity FAQ for an more in-depth tutorial:
http://www.synocommunity.com/faq
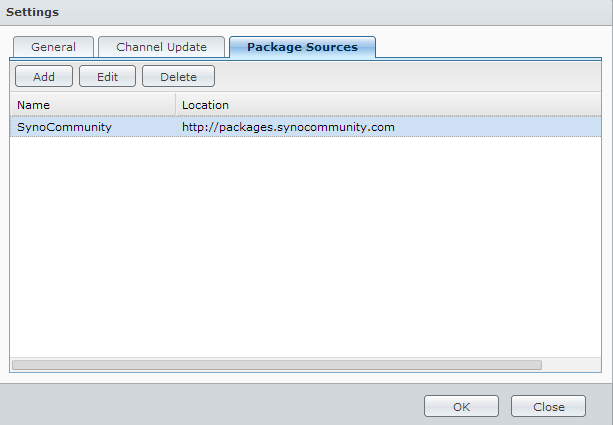
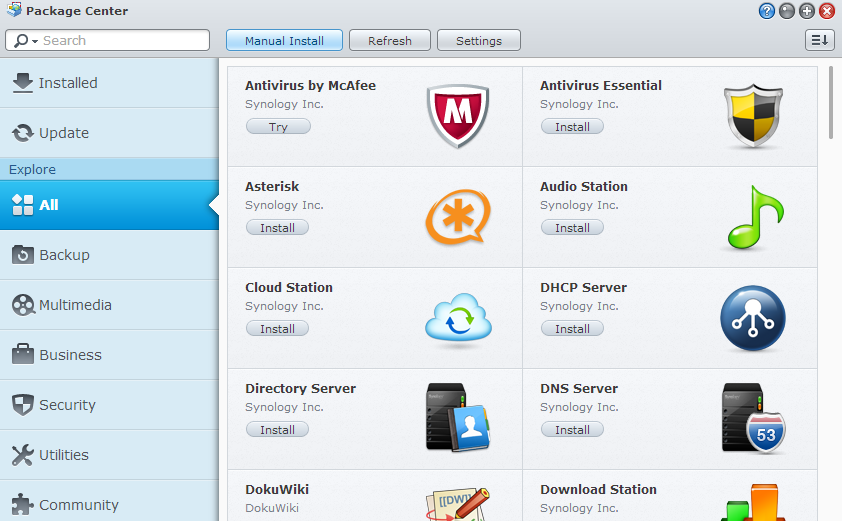
You should be able to see all SynoCommunity packages that are available, just install uMurmur

You now have Mumble on your Synology, open Mumble default port: 64738 http://mumble.sourceforge.net/Murmur.ini#port
Download Mumble:
http://mumble.sourceforge.net/
Install as client, and run through the audio wizard to set-up your system.
You would notice that uMurmur on default has no password, and uses an default SSL certificate. You may wish to modify the configuration file of uMurmur to your specification. There is an easy way of doing so without accessing Telnet, but you would have to install an non-official package.
Download Mertymade Config File Editor from:
http://www.mertymade.com/syno/

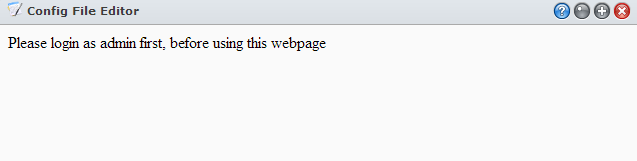
Do an manual installation

Ensure that you login as admin, just like you would in the terminal.
Once you successfully logged in as admin, you should config the Config File Editor package use the dropdown menu:
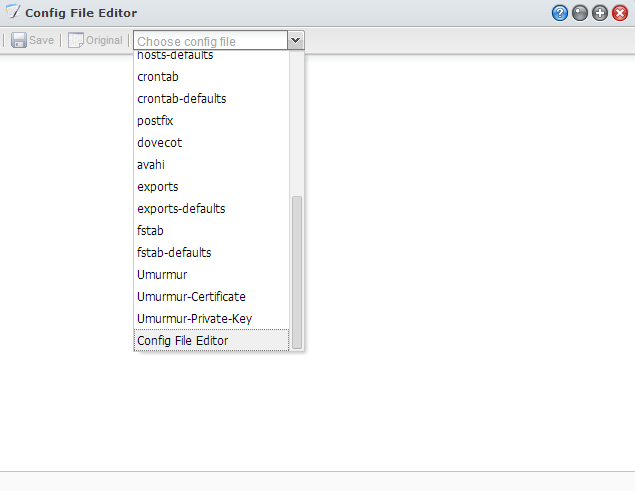
#####################################
# Configfile for 'Config File Editor'
#
# format:
# <full path to file>,<name to display>
#####################################

/etc/ssh/sshd_config,sshd
/etc.defaults/ssh/sshd_config,sshd-defaults
/usr/syno/etc/php.ini,php
/usr/syno/etc.defaults/php.ini,php-defaults
/usr/syno/apache/conf/httpd.conf-user,apache-user
/usr/syno/etc/smb.conf,samba Daemon
/usr/syno/etc.defaults/smb.conf,samba Daemon-defaults
/etc/inetd.conf, inetd.conf
/etc.defaults/inetd.conf, inetd.conf-defaults
/etc/profile,profile
/etc.defaults/profile,profile-defaults
/etc/hosts,hosts
/etc.defaults/hosts,hosts-defaults
/etc/crontab,crontab
/etc.defaults/crontab,crontab-defaults
/usr/syno/mailstation/etc/main.cf,postfix
/usr/syno/mailstation/etc/dovecot.conf,dovecot
/usr/syno/avahi/avahi-daemon.conf,avahi
/etc/exports,exports
/etc.defaults/exports,exports-defaults
/etc/fstab,fstab
/etc.defaults/fstab,fstab-defaults
/usr/local/umurmur/var/umurmur.conf, Umurmur
Add line 30 (Depending on your DSM version), this will locate the configuration file for Umurmur. Save and reload the app to see it in the dropdown menu, you should have something like this:
max_bandwidth = 48000;
welcometext = "Welcome to uMurmur!";
certificate = "/usr/local/umurmur/var/umurmur.crt";
private_key = "/usr/local/umurmur/var/umurmur.key";
password = "";
# admin_password = "test";   # Set to enable admin functionality.
# ban_length = 0;            # Length in seconds for a ban. Default is 0. 0 = forever.
# enable_ban = false;        # Default is false
# banfile = "/usr/local/umurmur/var/banfile.txt";   # File to save bans to. Default is to not save bans to file.
# sync_banfile = false;      # Keep banfile synced. Default is false, which means it is saved to at shutdown only.
# allow_textmessage = true;  # Default is true
# opus_threshold = 100;      # Percentage of users supporting Opus codec for it to be chosen. Default is 100.
max_users = 10;

# bindport = 64738;
# bindaddr = "192.168.1.1";

# username and groupname for privilege dropping.
# Will attempt to switch user if set.
username = "nobody";
# If groupname not set the user's default login group will be used
groupname = "nobody";

# Log to file option. Default is logging to syslog.
# umurmurd will close and reopen the logfile if SIGHUP is received.
logfile = "/usr/local/umurmur/var/umurmurd.log";

# Channel tree definition:
# Root channel must always be defined first.
# If a channel has a parent, the parent must be defined before the child channel(s).
channels = ( {
	 name = "Root";
	 parent = "";
	 description = "Root channel. No entry.";
	 noenter = true;
	 },
	 {
	 name = "Lobby";
	 parent = "Root";
	 description = "Lobby channel";
	 },
	 {
	 name = "Red team";
	 parent = "Lobby";
	 description = "The Red team channel";
	 # password = "redpw";
	 },
	 {
	 name = "Blue team";
	 parent = "Lobby";
	 description = "The Blue team channel";
	 # password = "bluepw";
	 }
);
# Channel links configuration.
channel_links = ( {
	 source = "Lobby";
	 destination = "Red team";
	 },
	 {
	 source = "Lobby";
	 destination = "Blue team";
	 }
);

# The channel in which users will appear in when connecting.
# Note that default channel can't have 'noenter = true' or password set
default_channel = "Lobby";
Default password:
Edit line 5
password = "example";
Enable Admin user:
Edit line 6, remove comment syntax.
admin_password = "test"; # Set to enable admin functionality.
Edit default SSL certificate and private key:
In the Config File Editor, add line
/usr/local/umurmur/var/umurmur.crt, Umurmur-Certificate
/usr/local/umurmur/var/umurmur.key, Umurmur-Private-Key
Use the dropdown menu and select Umurmur-Certificate, Umurmur-Private-Key. Copy the default file for safe keeping, before replacing it with your own. You could change the file location within Umurmur configuration file within /volume1/ on your Synology.
Currently I have yet to install the intermediate certificate, editing sslCA key with file location doesn’t work. Chaining certificate within the umurmur.crt does not work, I would assume this be a bug.